Demo Application
The quickest way to see how the Payment Engine rest API works is to try the demo app.
It provides a simple web UI for registering a device and processing a payment. At the
same time it keeps a log of the underlying rest calls that were made. These calls can be
used for comparison when writing your own app.
Running the demo app
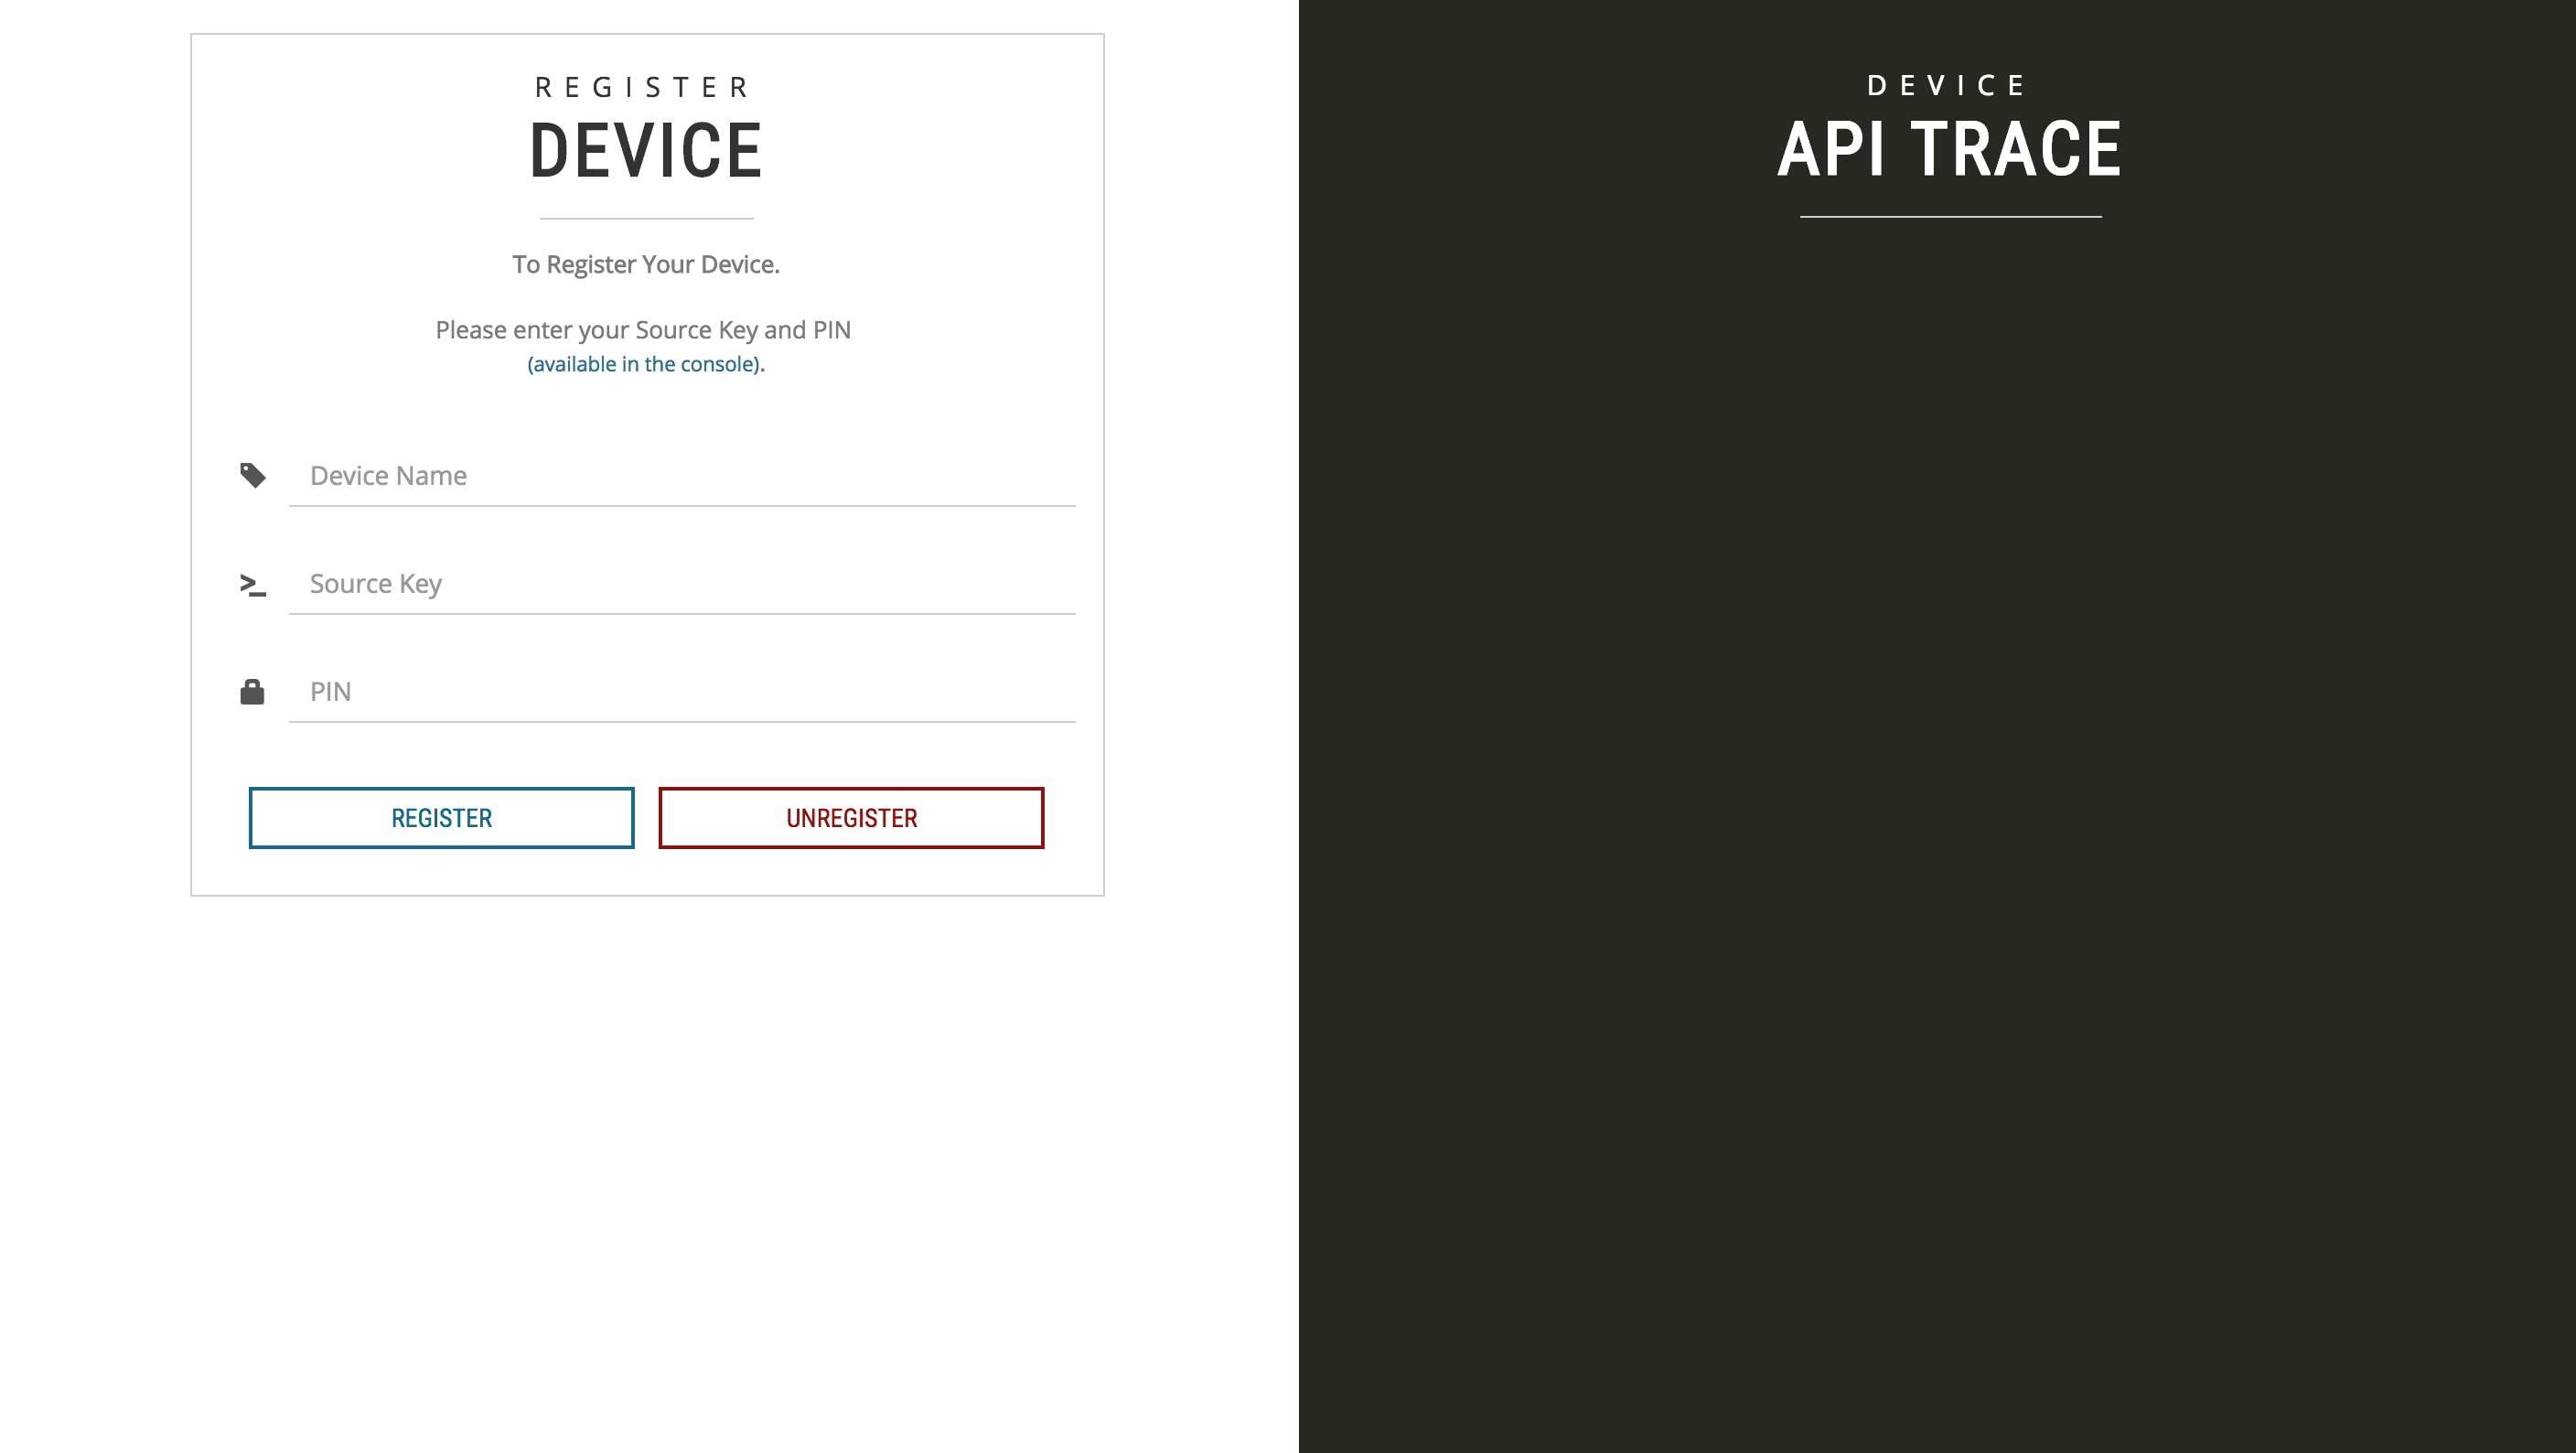
Step 1: Payment Application Demo
To open the Payment Application Demo go to https://demo.paymentengine.io. You should get the screen below.
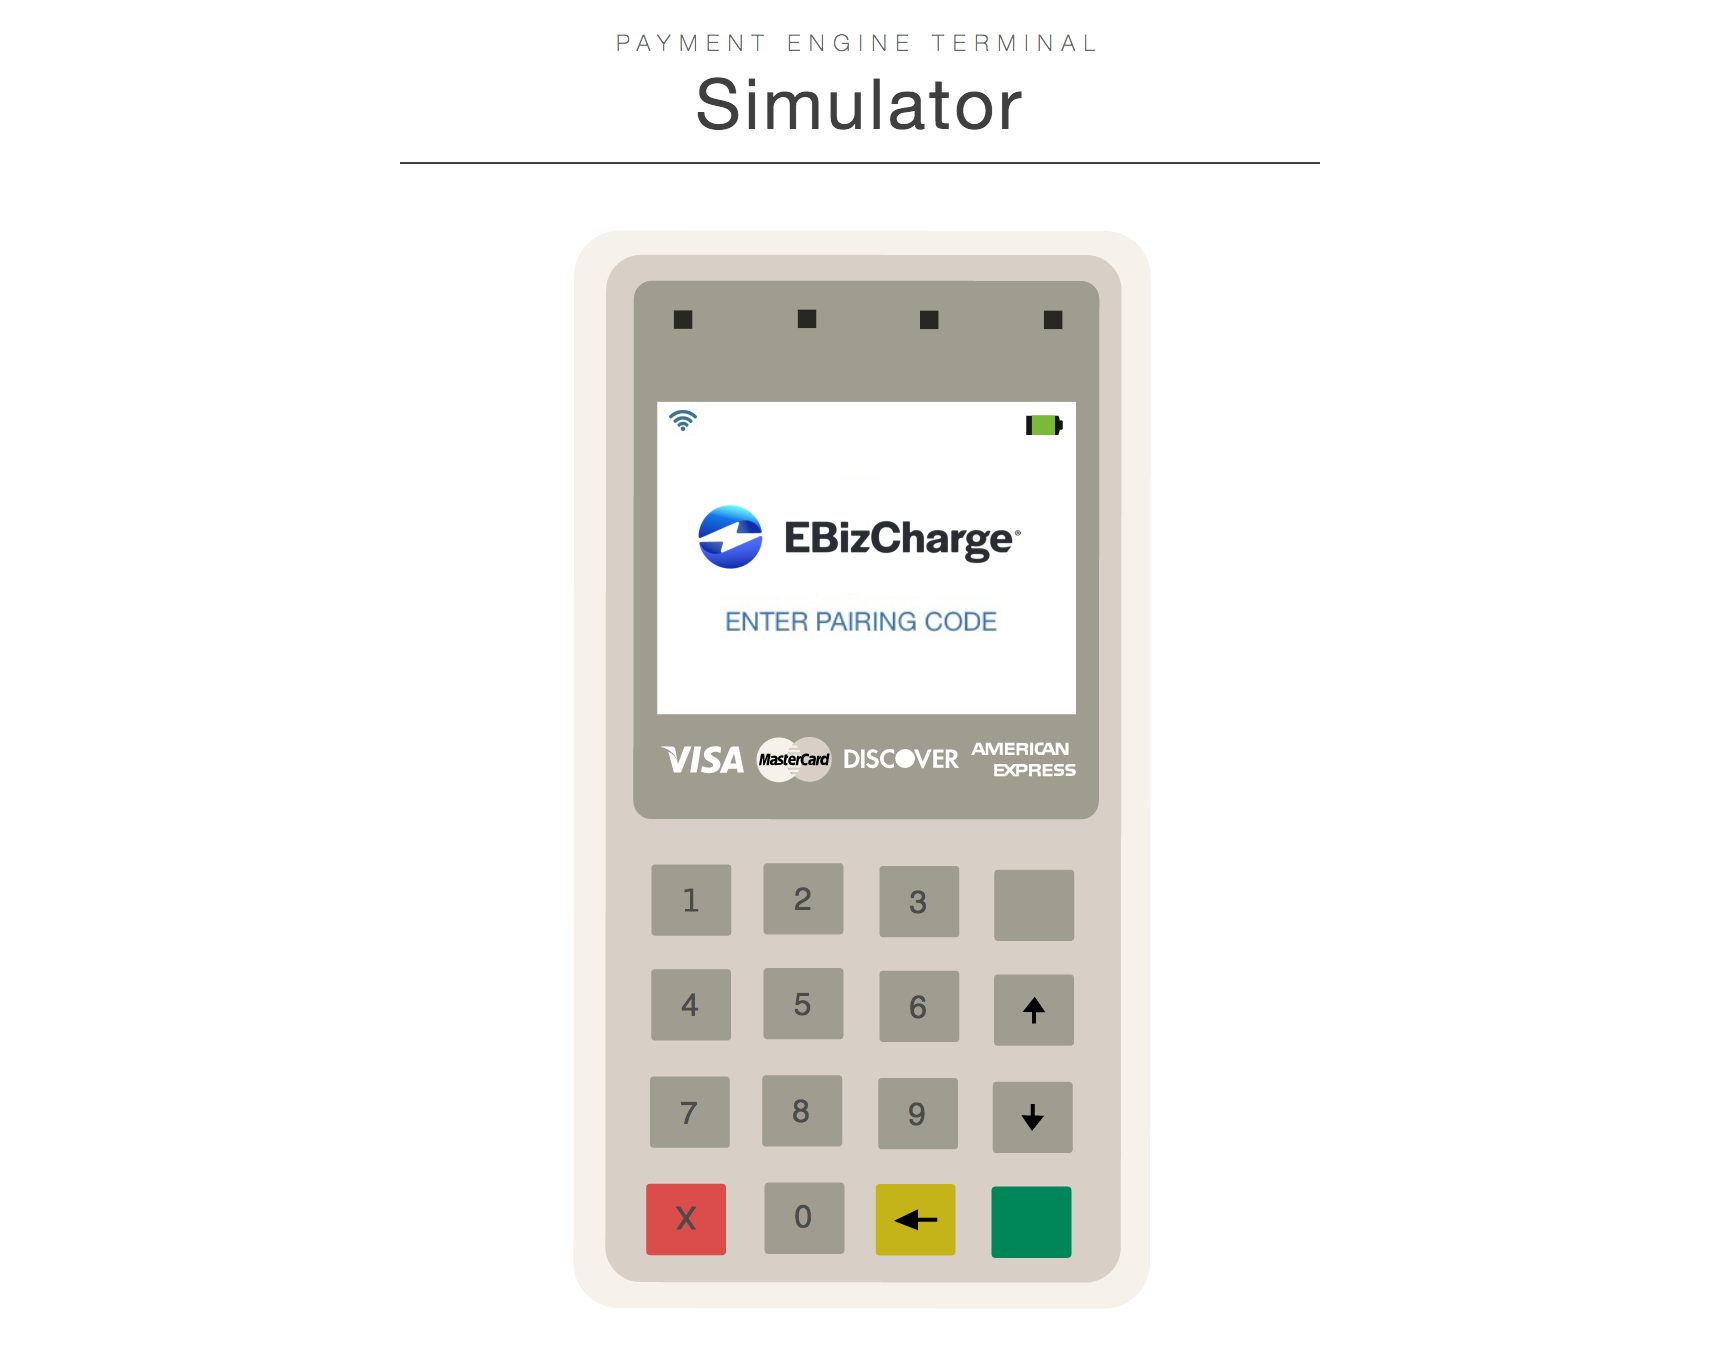
Step 2: Device/Terminal Simulator
When you are using the demo application, you can test using a terminal simulator OR you can use a real hardware device.
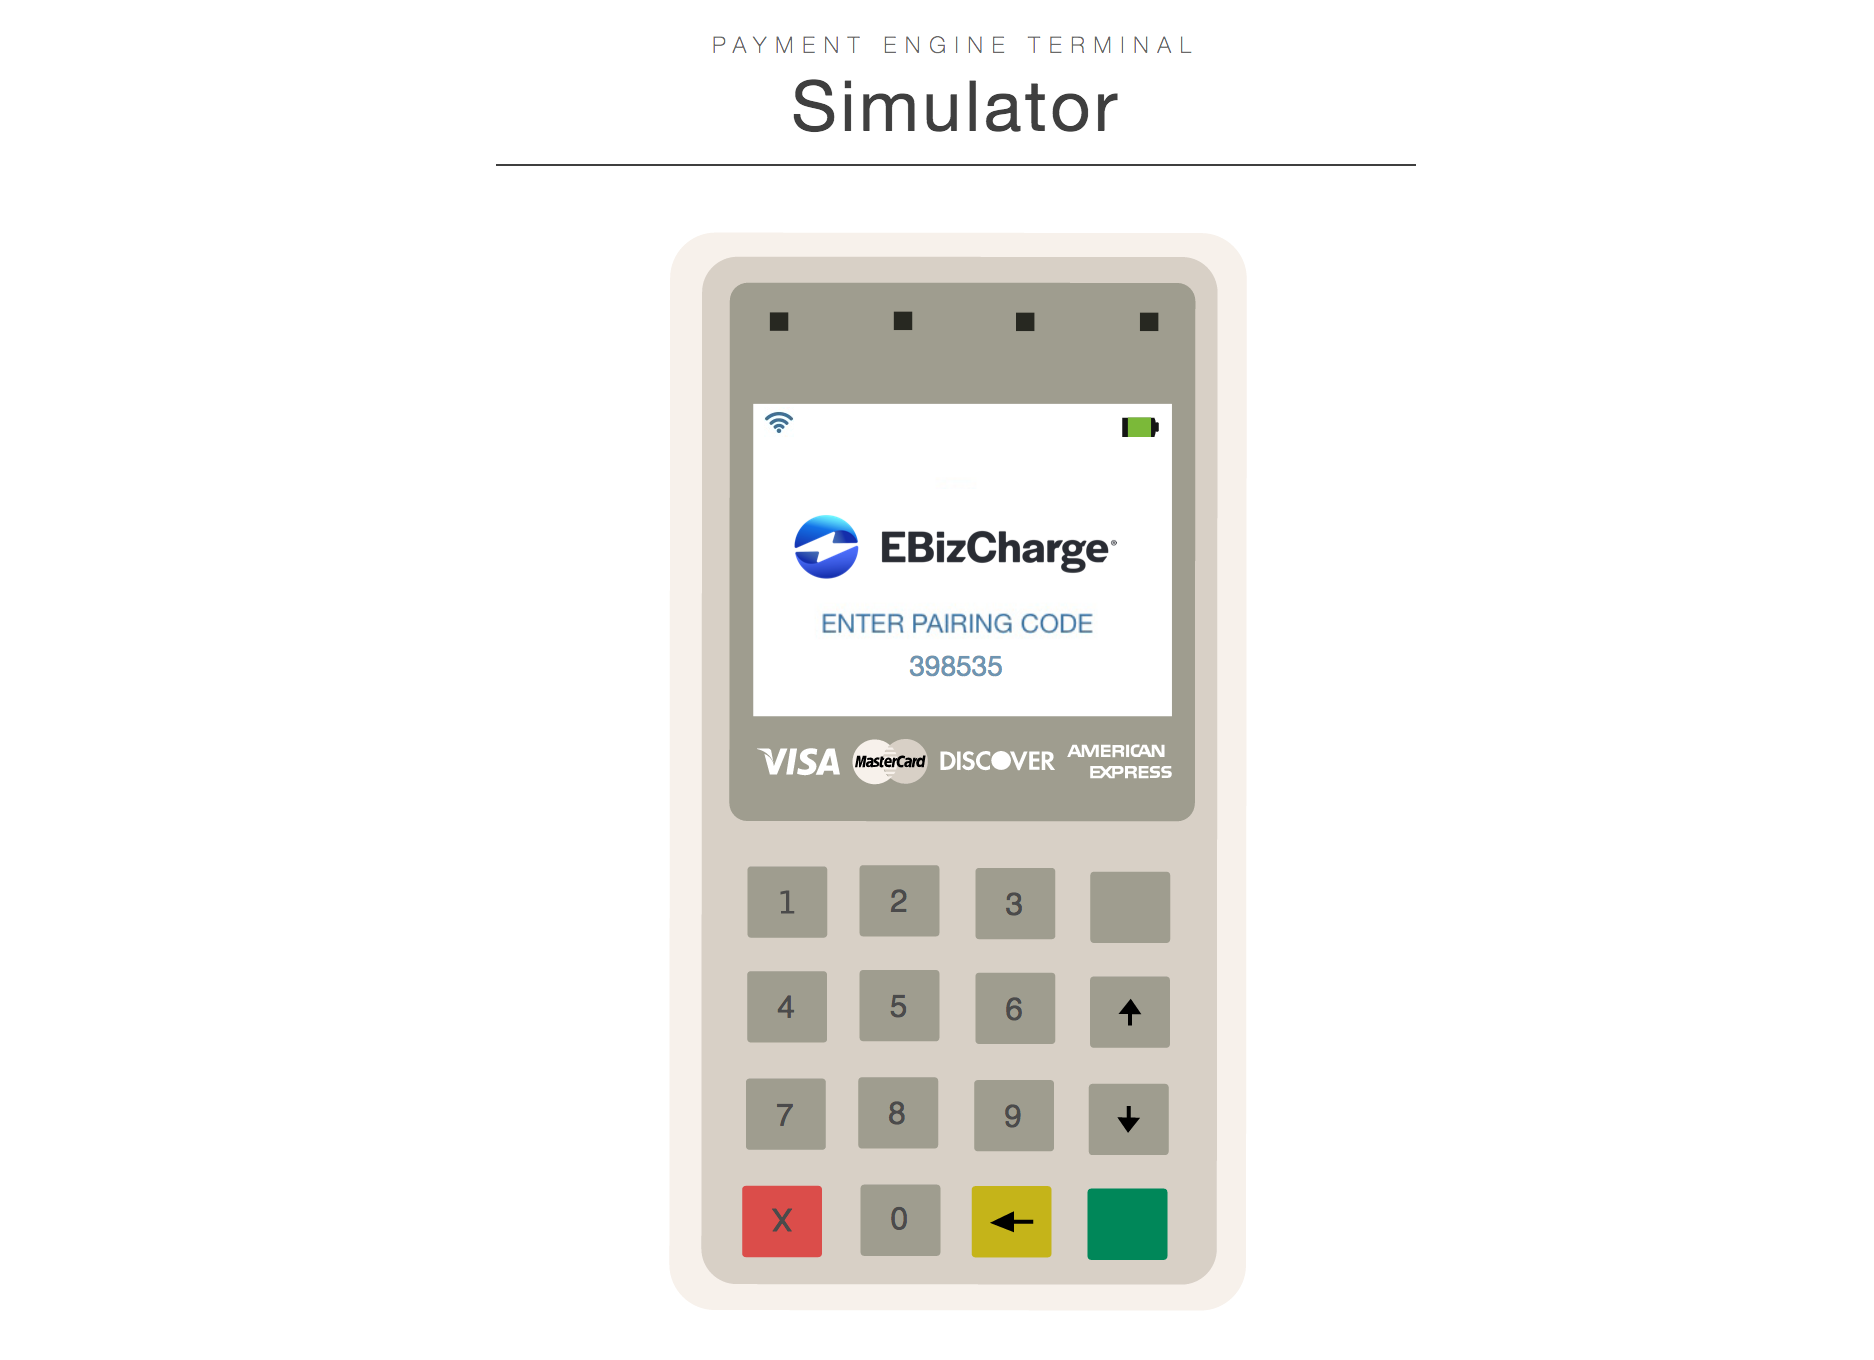
- To use the Castles MP200 terminal simulator, open a new tab and go to https://pos.EBizCharge.com/mp200 (pictured below). Please Note: If you are working in the sandbox environment you will need to use https://pos.sb.EBizCharge.com/mp200 instead.
- To use the demo app with a real hardware device, just boot your terminal and get it to the "Input Pairing Code" screen.
You can also try our simulators for the Verifone Mx915 and the Ingenico ISC320.
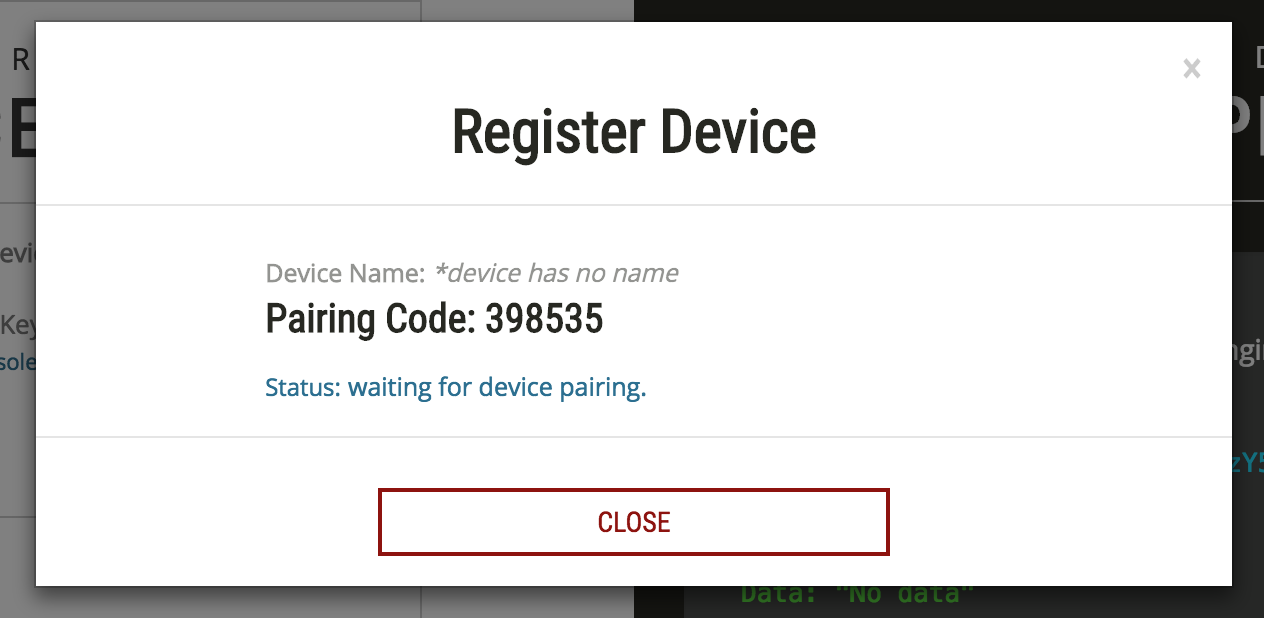
Step 3: Get Pairing Code
In the demo app tab, paste an API Key (source key) and PIN into the appropriate fields and click "Register". If you do not already have an API key, log into the merchant console and go the API Keys section of the Settings tab. If you will be using the simulator for testing, you will need a merchant account setup on the "testbed" platform. Please contact the integration support department for assistance. If you have entered a valid source key and PIN, you should see a window that looks like this:
Step 4: Enter Pairing Code on Terminal
Enter the pairing code that is displayed in demo app into the simulator (or real terminal) and then press the "Enter" button (or green button on the MP200):
If the code is entered correctly, you should get a welcome screen:

Step 5: Start Payment Request
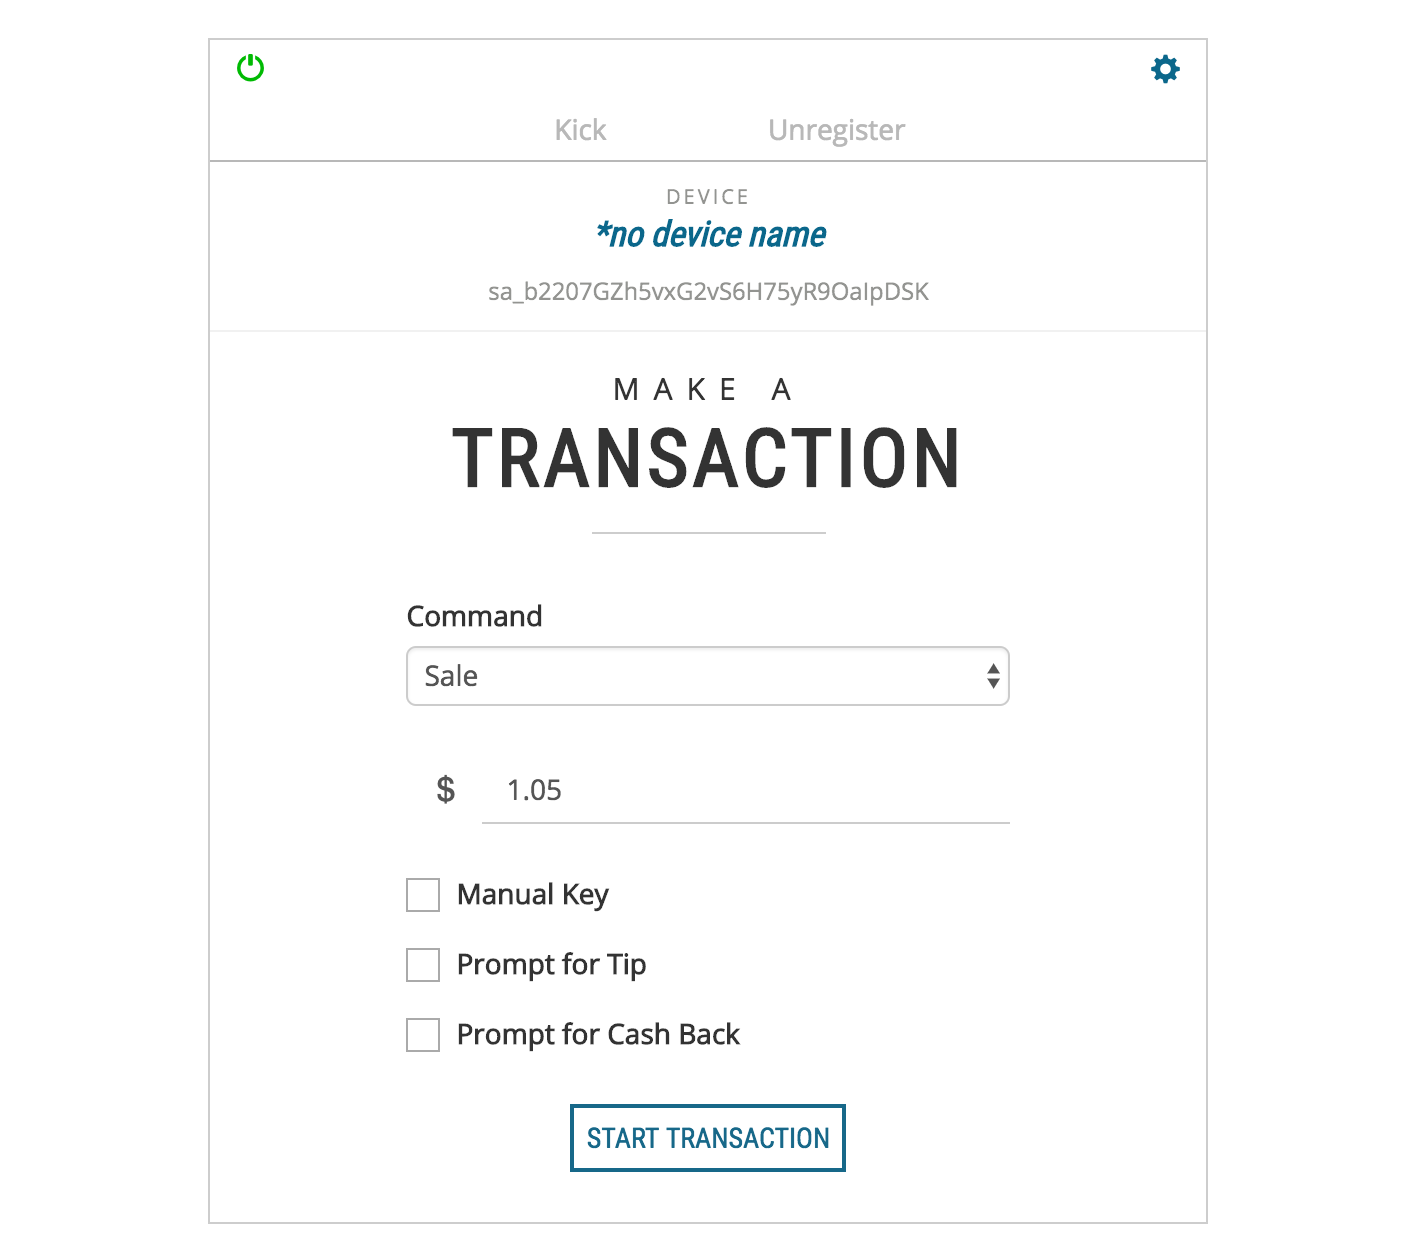
In the demo app, enter a desired amount and click "Start Transaction":
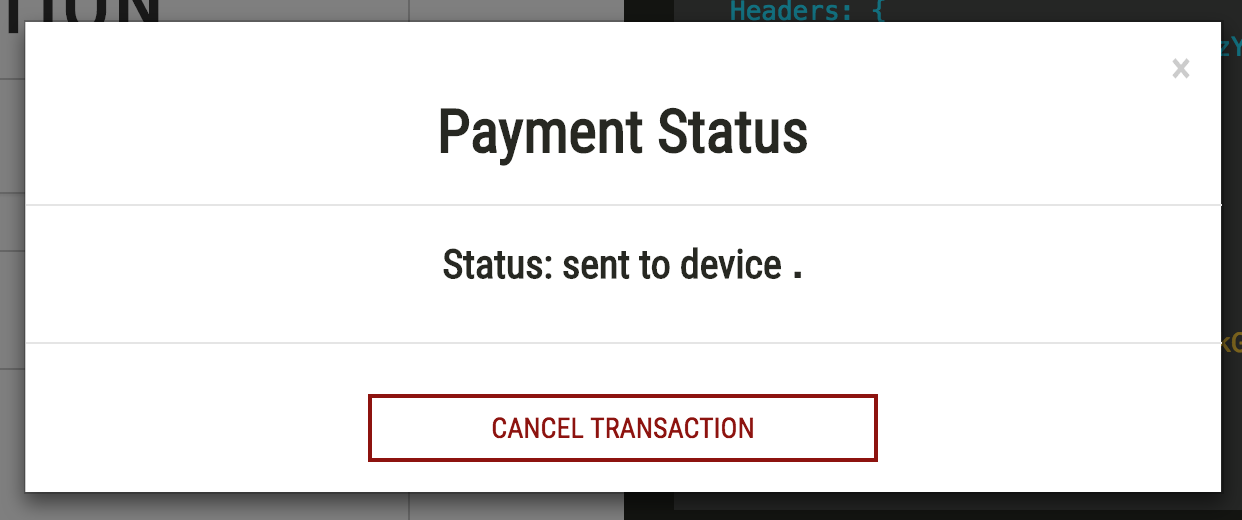
A pop-up that tracks the progress of the payment on the terminal should appear:
Step 6: Present Payment on Terminal
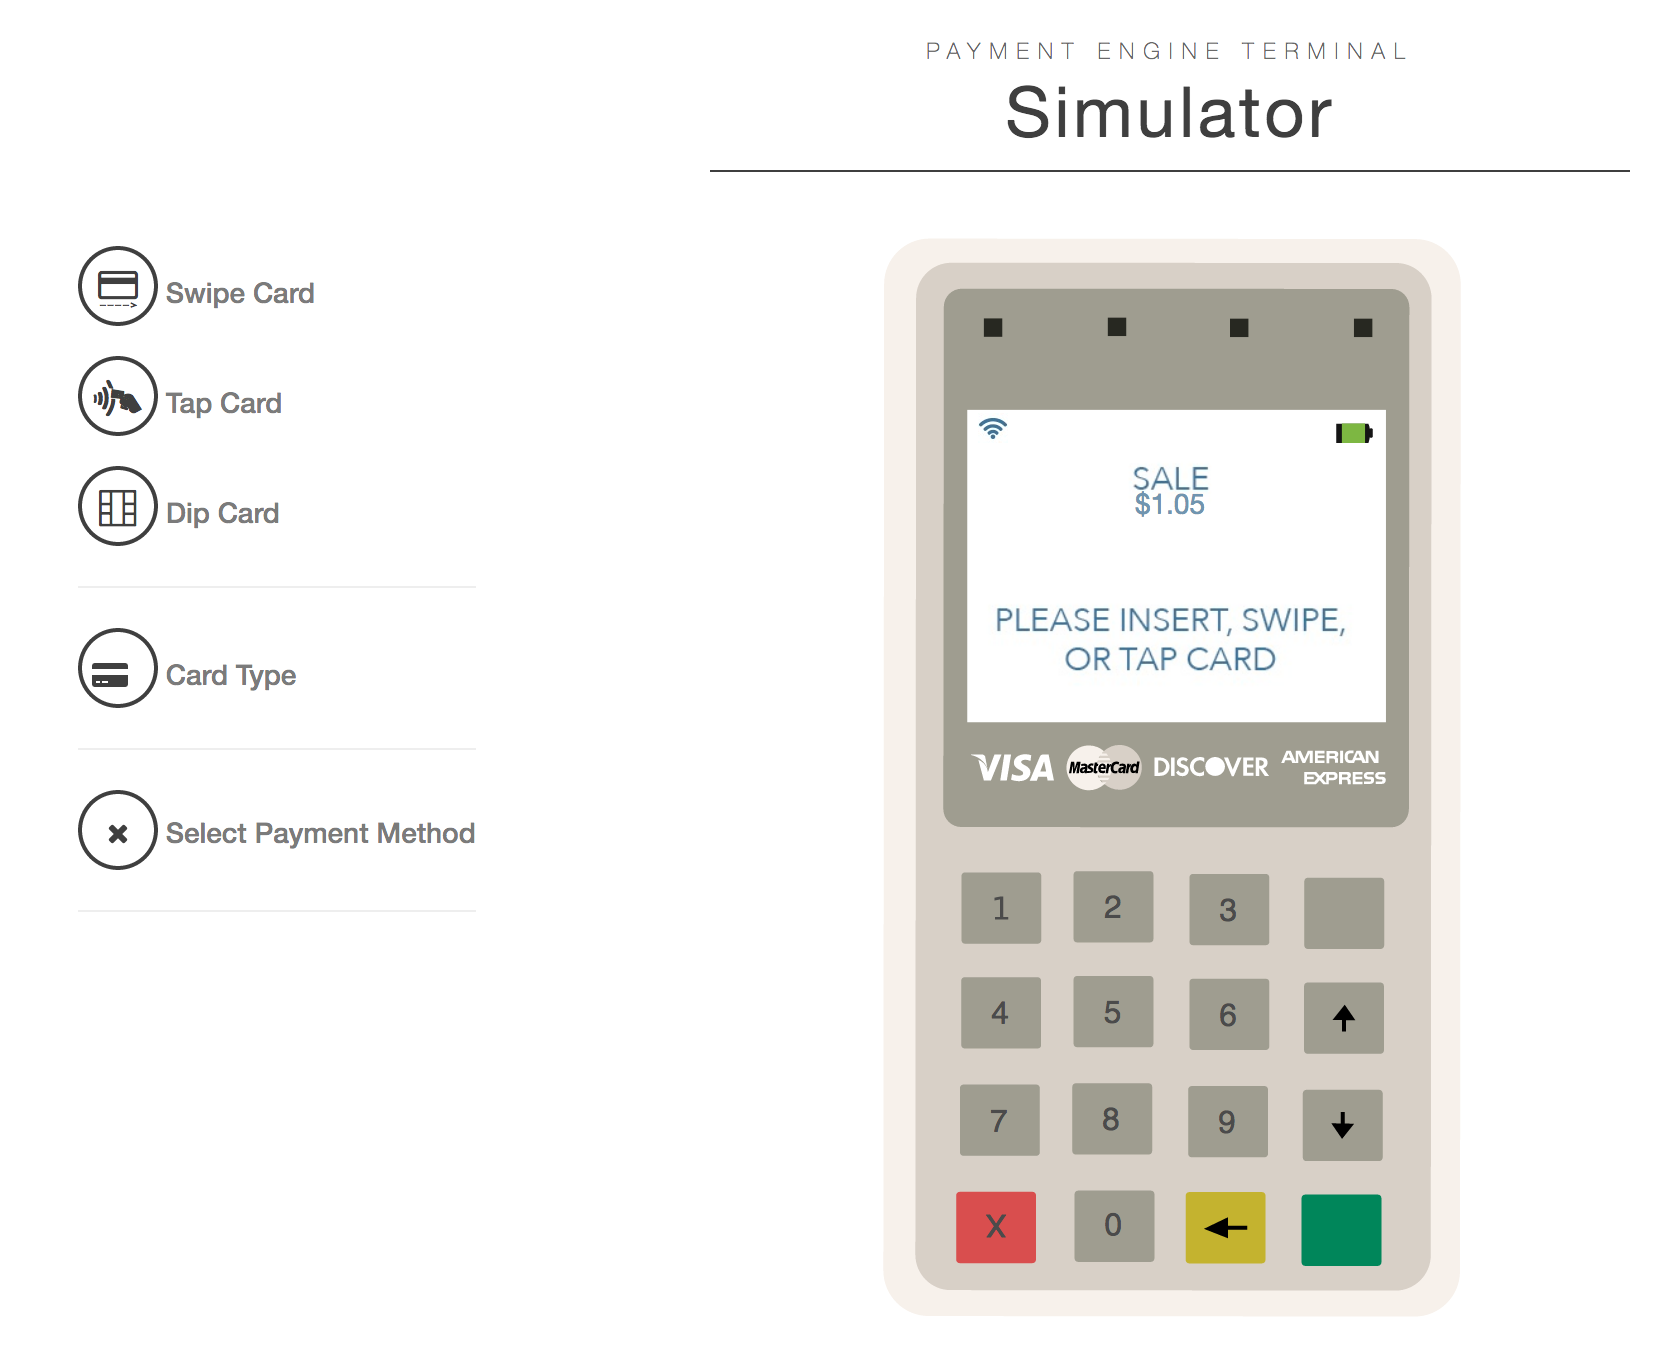
If using a real device, follow the prompts on the terminal screen. If using the simulator click on one of the "Swipe Card", "Tap Card" or "Dip Card" buttons. A card selection menu will come up that allows you to select a particular card brand and response type, ie "Swipe Visa: Approved". Once you have selected your card, click on the bottom left button.
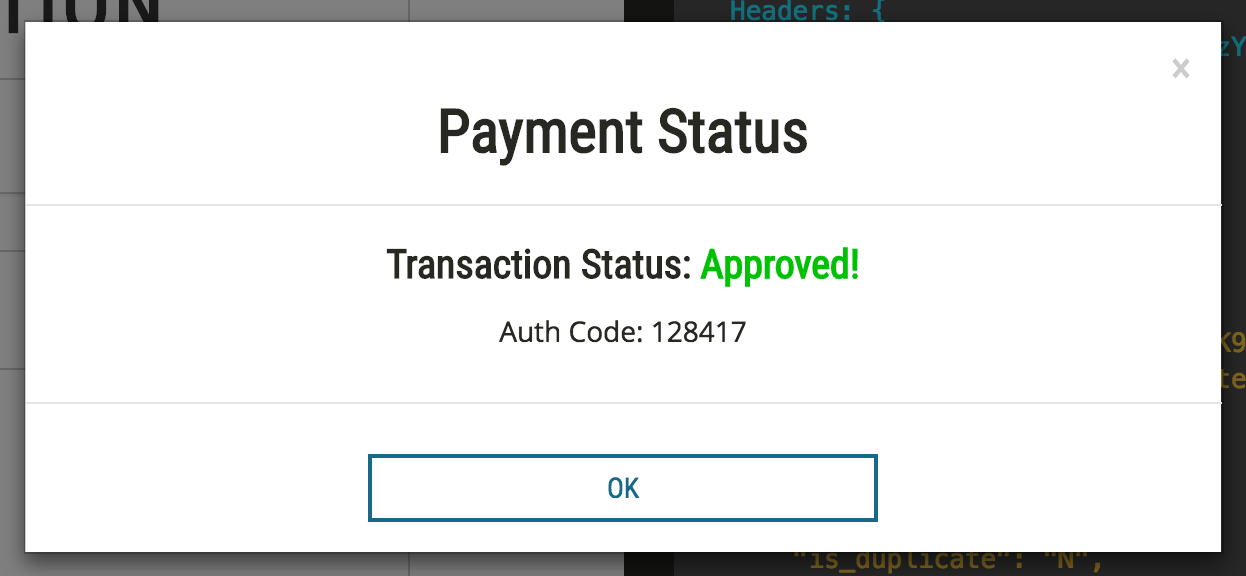
Step 7: View Transaction Result in the Demo App
Once the payment is complete, you should see the transaction result in the demo app: